
Showing posts with label Tutorials. Show all posts

Create a Beautiful Abstract Background in Illustrator

06 May 2010


A hello and a smile :) to all the awesome readers. I know, I have been lagging at updating my blog but, well I'm back with a new Illustrator tutorial. :)

In this tutorial I will show you how to create a beautiful abstract background in Illustrator. By using just a simple shape creating this abstract background is pretty easy and quick. By taking advantage of some of the nifty Illustrator Effects, Transparency and blending mode you get a beautiful vector graphic in no time. So let's get started!

Open a New Document

Open a new document,  mine has a width of 18 in and a height of 12 in, but it  doesn't matter what size and color mode your document is. Though to start with I will suggest you Hide the Artboard - View>Hide Artboard, because the size of this abstract background tends to becomes very big. Of course as it is vector, you can completely re-size the background to any size you prefer after you create it.

Create a Small Rectangle Shape

Now, start by creating a small rectangle shape as shown below with Rectangle Tool(M). The rectangle that you are seeing below has a approx. width of 33px and a height of 233px. Fill it with any swatch color you wish and remember to have no stroke.


Twist It

 Select the rectangle with Selection Tool (V) and Twist (Effect > Distort and Transform > Twist) it by 60 degrees.


Transform Each

Now begins the fun! Select the shape that we just twisted as above and open Transform Each dialog box (Object >Transform > Transform Each) and add the values as 120% for Horizontal and Vertical scale and Rotate Angle to -10 degree as shown in the image below and click Copy button.


Change the Blending Mode

Select the new copied shape and change it's Blending Mode to Multiply in Transparency Palette.


Transform Again

Now, while your new shape is still selected press Ctrl/Cmd+D 17 times. Like I told you before, now your graphic has become too big, just use the Navigator Palette or Zoom Tool to zoom out and make it fit to your window. Your abstract background should now look something like as shown in the image below.


Apply Clipping Mask

Next step is to make a Clipping Mask, for that, create a rectangle with the Rectangle Tool (M), only Stroke (any color), no fill over the image we just created as show in snapshot below. The idea of Clipping Mask is to show the area of image we want to and mask the part of image we want to hide. So with the rectangle try to cover the interesting areas of image or the area that you want to show.
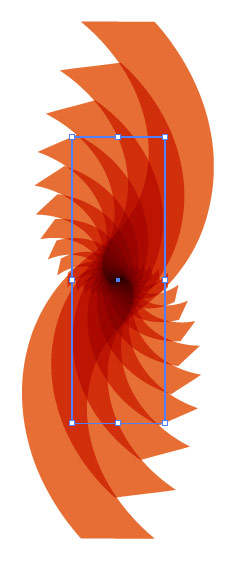
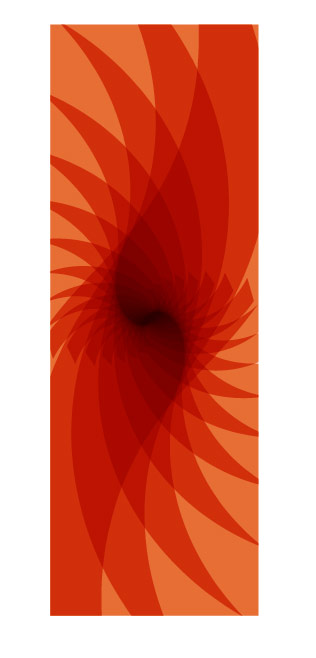
Now, make a Clipping Mask, Select All, press Ctrl/Cmd + A and goto Object > Clipping Mask > Make. You can also right click and select Make Clipping Mask. After that, you should get something like as shown in the image below.
Best part of Illustrator is that, everything is editable, so if you're not happy with your mask you can go back and re-do it by selecting it and click Object > Clipping Mask > Release. You can also right click and select Release Clipping Mask.

Rotate It

Select the  shape with Selection Tool (V) and Rotate it to 90 degree by double clicking on Rotate Tool (R)  so that we have a horizontal/landscape shape.
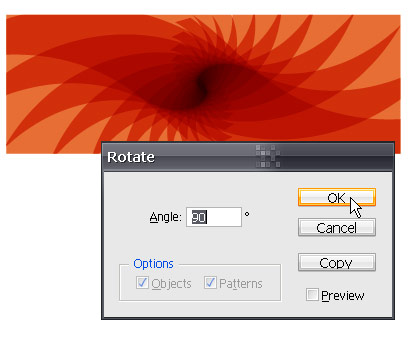
Now, you're almost done, you just need to give some finishing touches! You can either keep the same color or change it's color with Gradient or  Solid color of your choice.

Fill it with Gradient

I selected the shape and choosed Gradient,  RGB - 248, 234, 126 and RGB - 231, 110, 52. Also, like I have said earlier, the graphic tends to become to big, but you can resize it any time by using the Scale Tool  (S), scale it uniformly. I reduced it's size to 30 %.
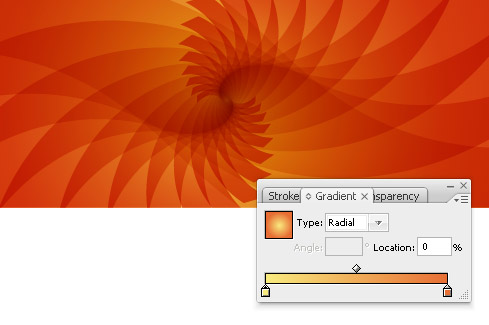

That should be it, your abstract background is ready, you can leave it as it is or experiment more!

Apply Pattern, Blend Mode and Twist

I created a another rectangle with Rectangle Too (M) over the Masked shape. And, filled it with a Pattern Swatch (and no Stroke), named "Undulating Fine Lines" , you can find it in your Swatch Palette click on the Right Menu, select Open Swatch Library > Patterns > Basic Graphics > Basic Graphic_Lines.
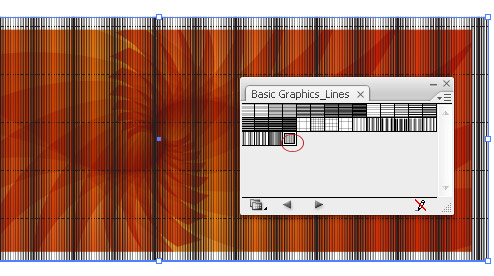

 Then I changed it's Blending Mode to Screen.
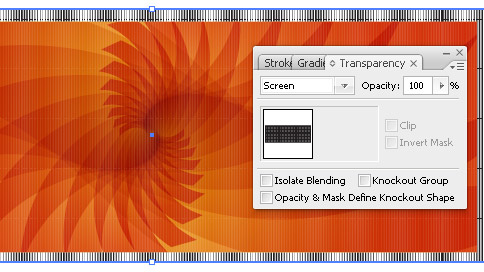

Next, I have Twist it to -80 degrees using Effect > Distort and Transform > Twist. I also rotated it a bit with Selection Tool (V).
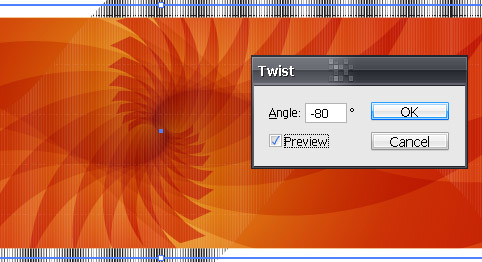

Finally...

Finally, I dragged that Pattern layer beneath the layer named, Clipping Path, so that areas outside of rectangle  is masked.
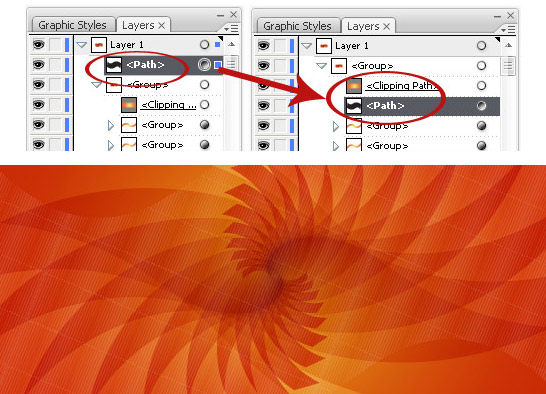
And, here is my final images!
Click on the image for larger image

Hope you enjoyed the tutorial! Feel free to share the link. :)

Subscribe Get Free Updates by RSS

READ MORE...

Photoshop Quick Tip: How to Create Photo Text with Type Mask Tool

11 March 2010

A Photoshop quick tip (video) on how to create a Photo Text (text with image inside) using Type Mask Tool. In Photoshop,  there are several ways to create photo text, one of the quickest way to create photo text is by using Type Mask Tool. I hope you enjoy and find this lil Photoshop Tip useful.


I'm just starting with video tuts, so please excuse a lil low resolution of video or if you find it too fast or slow. I intend to make more video tip/tuts so with practice it hopefully will get better.

READ MORE...

Illustrator Tip: How to Remove White Background in Live Trace

28 November 2009

Live Trace in Adobe Illustrator is a automated and a quick way to easily convert any bitmap or raster image into vector graphic. A lot of raster images or logos have a white background and most of the time when you live trace, you only need the image with transparent background. So in this tip, I will quickly show how you can easily do away with white background using "Ignore White" command.

Just to show you a example, lets use this Shopping bag image from sxc.hu. Open a new document and place the image, File > Place in Illustrator.


Next press on the Live Trace button on the option bar and click on Tracing option dialog as shown in the image below.


In the dialog box choose the settings that you prefer,(I just choosed Photo High Fidelity for Preset and all other settings to default) now, click the checkbox ON for Ignore White as shown in the image below. Remember to check the Preview button to see the changes.


If checked, the Ignore White checkbox allows users to decide whether Illustrator shall leave/omit the areas that include white transparent and if unchecked they shall be filled in with white.

Click on the Trace button when you're done. And here is your image without the white background. Below I have added a blue gradient n the background, just to show you that now you have your vector shopping bag without the white background.


Subscribe Get Free Updates by RSS

READ MORE...

30 Brilliant Photoshop Text Effect Tutorials

26 October 2009

Photoshop combined with a designer's skill can do awesome stuffs! And, one of those awesome stuffs are Text Effects, one can create some amazing text effects in Photoshop! With this article I tried to look around the web to see some stunning text effect tutorials because no matter what your skill sets are we all need to keep sharpening our skills, experiments and learn something new!

Add Fantastic Color to 3D Text


Kaboom! Exploding Text


Realistic Chrome and Glossy Plastic Text Effect


Patriotic Text Using Displacement Masks


How to Quickly Create a Stylish Retro Text Effect


Great Gooey Photoshop Text Tutorial


Slow Shutter Effect


How to Create High Quality Metal 3D Text in Photoshop


Creating Very Cool Folded Typo


Scanline Text


Old School Type – Line Gradients


6 Quick’n'Dirty Photoshop Text Effects From Scratch


Awesome Milk Typography Effect in Photoshop


Shiny Calligraphy Text Effect in Photoshop


Write Message In Sand


Transparent Glass Lettering in Photoshop


Paint Graffiti on Wall in Photoshop


How to Create Eroded Metal Text with Photoshop


Text In Stitches


Create a Spectacular Grass Text Effect in Photoshop


Text Effects - Plastic Text


Watercolor Text Painted on a Wet Paper


Aged/Distressed Type Effect in Photoshop + Free Action Download


How to Create Inset Typography in Photoshop


3D Text effects


Design a Slick 3D Ice Text Effect


Multi-colored effect


Create a Layered Glowing Text Effect


Candy Coated Photoshop Tutorial


3D Textured Text Effect

And, this one is written by yours truly as guest author! :)


Subscribe Subscribe by RSS

READ MORE...
Blog Widget by LinkWithin