
A hello and a smile :) to all the awesome readers. I know, I have been lagging at updating my blog but, well I'm back with a new Illustrator tutorial. :)
In this tutorial I will show you how to create a beautiful abstract background in Illustrator. By using just a simple shape creating this abstract background is pretty easy and quick. By taking advantage of some of the nifty Illustrator Effects, Transparency and blending mode you get a beautiful vector graphic in no time. So let's get started!
Open a New Document
Open a new document, mine has a width of 18 in and a height of 12 in, but it doesn't matter what size and color mode your document is. Though to start with I will suggest you Hide the Artboard - View>Hide Artboard, because the size of this abstract background tends to becomes very big. Of course as it is vector, you can completely re-size the background to any size you prefer after you create it.Create a Small Rectangle Shape
Now, start by creating a small rectangle shape as shown below with Rectangle Tool(M). The rectangle that you are seeing below has a approx. width of 33px and a height of 233px. Fill it with any swatch color you wish and remember to have no stroke.
Twist It
Select the rectangle with Selection Tool (V) and Twist (Effect > Distort and Transform > Twist) it by 60 degrees.
Transform Each
Now begins the fun! Select the shape that we just twisted as above and open Transform Each dialog box (Object >Transform > Transform Each) and add the values as 120% for Horizontal and Vertical scale and Rotate Angle to -10 degree as shown in the image below and click Copy button.
Change the Blending Mode
Select the new copied shape and change it's Blending Mode to Multiply in Transparency Palette.
Transform Again
Now, while your new shape is still selected press Ctrl/Cmd+D 17 times. Like I told you before, now your graphic has become too big, just use the Navigator Palette or Zoom Tool to zoom out and make it fit to your window. Your abstract background should now look something like as shown in the image below.
Apply Clipping Mask
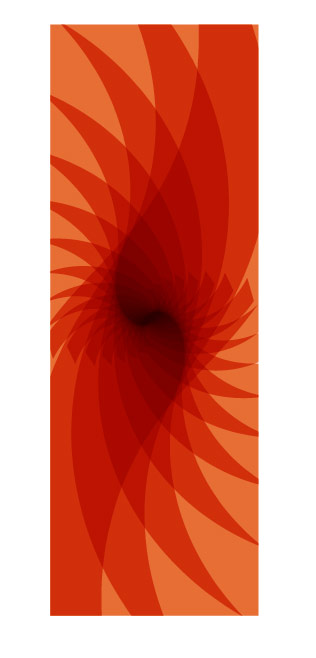
Next step is to make a Clipping Mask, for that, create a rectangle with the Rectangle Tool (M), only Stroke (any color), no fill over the image we just created as show in snapshot below. The idea of Clipping Mask is to show the area of image we want to and mask the part of image we want to hide. So with the rectangle try to cover the interesting areas of image or the area that you want to show.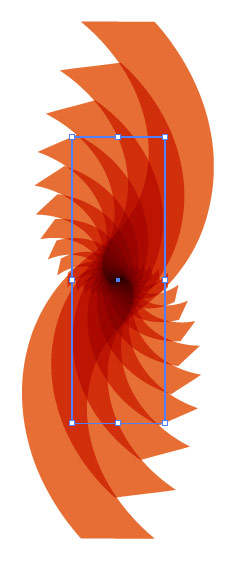
Rotate It
Select the shape with Selection Tool (V) and Rotate it to 90 degree by double clicking on Rotate Tool (R) so that we have a horizontal/landscape shape.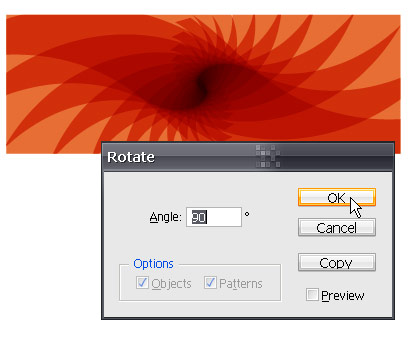
Now, you're almost done, you just need to give some finishing touches! You can either keep the same color or change it's color with Gradient or Solid color of your choice.
Fill it with Gradient
I selected the shape and choosed Gradient, RGB - 248, 234, 126 and RGB - 231, 110, 52. Also, like I have said earlier, the graphic tends to become to big, but you can resize it any time by using the Scale Tool (S), scale it uniformly. I reduced it's size to 30 %.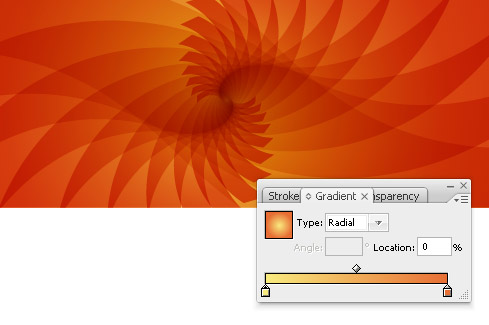
That should be it, your abstract background is ready, you can leave it as it is or experiment more!
Apply Pattern, Blend Mode and Twist
I created a another rectangle with Rectangle Too (M) over the Masked shape. And, filled it with a Pattern Swatch (and no Stroke), named "Undulating Fine Lines" , you can find it in your Swatch Palette click on the Right Menu, select Open Swatch Library > Patterns > Basic Graphics > Basic Graphic_Lines.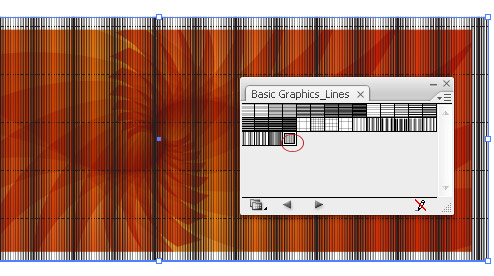
Then I changed it's Blending Mode to Screen.
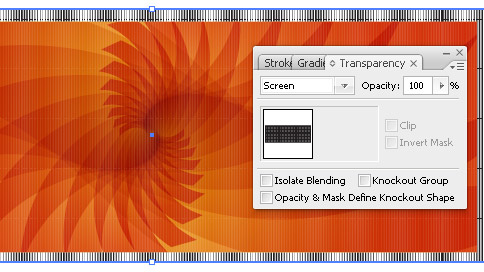
Next, I have Twist it to -80 degrees using Effect > Distort and Transform > Twist. I also rotated it a bit with Selection Tool (V).
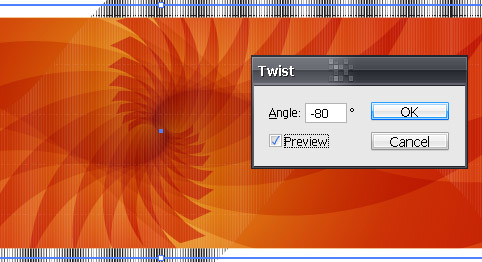
Finally...
Finally, I dragged that Pattern layer beneath the layer named, Clipping Path, so that areas outside of rectangle is masked.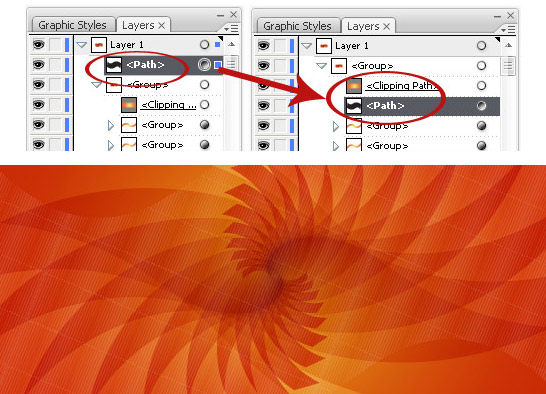
And, here is my final images!
 |
| Click on the image for larger image |
Hope you enjoyed the tutorial! Feel free to share the link. :)


26 comments:
Tutorial added to the web tuts !
Greate work, nice and simple!
nice job:)
First part until gradient background very good result.
I really dislike the pattern part and its outcome.
Vettori
It's not really necessary to do the pattern part, but as this is a tutorial, I wanted to show how you ca do more with the design.
Thanks.
Should this work with CS3? I can't figure out why I'm not getting the dark tones when I ctrl+D with transparency at multiply. The middle of my object is solid orange.
Yes, it should work in CS3, you need to transform the shape (using Transform Each command, as shown above), then add blending mode (to multiply) and then repeat it using Ctrl+D.
great work..
i found another site having good page rank tutorials..
see link below
http://www.tutorials99.com
this is very nice! I am new to Illustrator, mostly drawing in CorelDraw, so finding this blog is very cool for me:)
Thanks!
@ychty I'm glad that you find it useful. Thanks. :)
That's amazing!! Thanks for your excellent work!! Looking forward to more!!! I just did it exactly as you teach, and I will put it on my website! I will post when ready.
Thank you!
Amazing tutorial!I must excellent work.Thanks for share.
This isn't working for me in CS2 .... I transform the first twisted rectangle and it transforms, but when I change the transparency to multiply, it doesn't change at all. Can this be done in CS2 or am I still living in the stone ages? :-)
Kristilyn, though i have not checked it, it should not be a problem in CS2. Make sure you have selected the shape.
I like your style to presents this tutorial and i will try to make another abstract backgroud in another colors.
Thanks.
Hi,
I am working cs4. I'm not getting the dark tones when I ctrl+D with transparency at multiply. The middle of my object is solid orange.
Hi Rathinam, I guess it should work in cs4, make that you select the new copied shape and change it's Blending Mode to Multiply in Transparency Palette.
Wonderful blog thanks for sharing
Its a valuable contribution from your side.I appreciate it.
I haven't really tried creating a design using Illustrator. I think it's simpler than other software; I should probably use it.
dentist seo
A good maintain a graphic design. Really good work and make good design. I appreciate and i also try to make that type of design.Thanks for share with me.
This is my first time i visit here. I found so many entertaining stuff in your blog, especially its discussion. From the tons of comments on your articles, I guess I am not the only one having all the enjoyment here! Keep up the good work.
What a great talent you have presented here really superb.Thnaks for explaining this useful tut step by step here .Good work keep it up...
Very useful you possess lots of understanding on this subject.
Ethical Search Engine Optimization
The blog is absolutely fantastic. Lots of great information and inspiration, both of which we all need. Thanks.
thank you so much this was very helpful
Post a Comment
Hello and welcome to Musings! If you like the article you just read you can subscribe here to get updates via RSS or opt to have them sent directly to your inbox.
I appreciate your feedback so please feel free to comment.