
In this tutorial, I will show you how to create sticker style effect in Adobe Illustrator. Sticker effect is quite common and I am sure, you might have seen it used in various designs. So lets get started and let me tell you, it is quite easy and you can create a sticker style text in no minutes and you can apply the same technique for any graphic illustration as well.
Step 1
Type down the text, make sure to use a little thicker font, I used Arial Rounded MT Bold. Select the text, right click, and choose Create Outline, so that we can apply gradients to the text (I wonder why doesn't Adobe make the text go with gradients without converting the text into outline). If you don't want to use gradients in text, you may choose not to convert your text into outline.
Step 2
Apply gradient to text, I decided to use shiny web 2 style gradient, you can see the values of CMYK in the image below.
Step 3
With the Rectangle Tool (M) create a square or rectangle fill it with any color you like except white and select it, right click and choose Arrange > Send to Back so that you have a background below the text. You could do this at the Step 1 itself.Now, select the text, Copy it (Ctrl/Comm + C) and Paste in Back (Ctrl/Comm + B). While the text you just pasted is selected, change it's Fill color to white (with no stroke) and go to Object > Path> Offset Path and choose the settings as shown in the image below or any setting that suits your text.
Note: You can also offset the path via, Effect > Path > Offset Path, which is actually a better way because later if you want to edit it, you can always do so from Appearance Panel. Also, if you have not turned your text into outline in Step 1, you will have to offset the path via Effect Menu.
Step 4
While the path you just offset in Step 3 is still selected, open your Pathfinder Panel and hit Add button.
Next, if you wish you may also apply gradient to the offset path. For the Left Slider I choosed the color of gradient as shown in image below and for Right Slider the color is 0% for CMYK.
And, then apply some Drop Shadow (Effect > Stylize > Drop Shadow) to the selected path.
That's about it! Quite easy right?!
Also alternatively, instead of applying the drop shadow, you can duplicate the offset path, send it back, offset the path again to around 2 pixels, change it's fill color to black and bring down it's opacity to around 10 or 13%.

In the similar way, you can create the sticker effect on any graphic illustration or shape. But the steps are slightly different.
Take any illustration and give it a background.

Select the illustration with the Selection Tool (V), Copy it (Ctrl/Comm + C) and Paste in Back (Ctrl/Comm + B). While it is still selected, Ungroup it via Object > Ungroup (Ungroup it till it is completely ungrouped, that is till you see the Ungroup button is greyed).
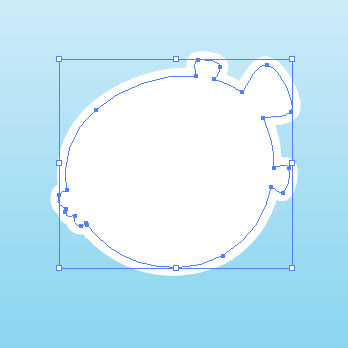
Whilst it is still selected, open your Pathfinder Panel and hit Add button, as shown in the image in Step 4 above. And, change it's Fill color to white (with no stroke) and go to Object > Path> Offset Path and choose the Offset Settings that suits your illustration.
You can see your Offset Path as shown in the image below, if you click on the eye button of your main illustartion in Layer Panel.
Finally apply some Drop Shadow as mentioned above.


17 comments:
I just realized that my other blog is from blogger.com as well, so i can even comment as a Member - wohoo :D
So what i wanted to say, this is a really nice and simple tutorial. Maybe i should really take some time to try to use all the tutorials you have created so far. Still haven't started to learn to work with Illustrator :B
I think, i have already seen that blog, fab design there!
You totally should! Illustrator is very addictive, once you get the hang of it, you would love using it more often. ;)
And, YAY for dropping by! :)
nice tutorial, thanks a lot..
Hello, I'm new to Illustrator and I couldn't figure out how to do the "shiny web 2 style gradient." Could you please help me figure out how to do that? Thanks!
@ juliet - Hello :) For the gradient, just use the values shown on image in Step 2.
If you still have problem with that, just let me know. Basically, you can use any gradient or even a solid color also.
i can not figure out how you get your gradient to to two colors with a sharp line like that.
To get the sharp line like that, duplicate the third slider in the gradient panel and move it exactly above the middle gradient slider.
Hi!
Any chance of making the final Sticker file available for download? No matter what I do I can't seem to get the gradient right, thought looking at a properly done file would be very nice!
Thanks if you can,
Erik
Hi Erik,
To get the gradient right, have you tried: duplicating (press alt key while dragging the slider) the third slider in the gradient panel and move it exactly above the middle gradient slider.
When you open the appearance panel, you can add a new fill ( even gradient ) without creating an outlined text.
Hi, ive tried all the methods mentioned above but I do not seem to get that sharp change in colour line that appears in the image above on the gradient. It just keeps on showing a smooth gradient change
Alex, it's quite simple and I have explained how to do that with my reply to Erik and Anonymous above.
But, seems like lot of people have trouble getting that kind of gradient, so instead of explaining again, I will try to write a short tut on it. Stay tuned. :)
I just messed with it a tad and got the line where it's split two separate colors.
That's fab. Also, as there were many readers who asked how to do that, I have written a small tip on how to do the same: Reader's Question: How to get the sharp line in Gradient (Illustrator Tip) . :)
This tutorials really help to harness my skills in Illustrator. Thank you very much. Las Vegas Web Design
Great work.........keep going
Thanks for sharing this valuable information to our vision. You have posted a trust worthy blog keep sharing.
Regards,
Web design training institute in Chennai
Post a Comment
Hello and welcome to Musings! If you like the article you just read you can subscribe here to get updates via RSS or opt to have them sent directly to your inbox.
I appreciate your feedback so please feel free to comment.