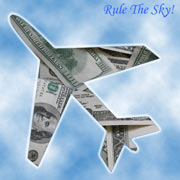
I wrote a Photoshop tutorial for 13 Dots, of which I am a member since sometime now.So, if you are a Photoshop enthusiast you may like to know how to Turn Images Into Shapes:
I had seen a image effect in a magazine, & thought to do it myself too! So, I stumbled upon this technique after some trial & errors in Photoshop. But, ofcourse I do believe that there are more than one way of doing things in Photoshop!Step 1:
Open a new document in Photoshop, 600 pixels wide & 600 pixels high with white background. If you are planning to print your image, make the dpi 300 or whatever your printer requires. If it is for the web, 72 dpi is fine.Step 2:
Create a New layer, name it Shape layer.Step 3:
Click on Custom Shape Tool (U) on your Tool Box & Select a AirPlane Shape from option bar. 

Step 4:
Now, on your shape layer, Create a Airplane shape, hold down shift key whilst drawing the Airplane.Step 5:
Open your image. I used following image (sxc.hu). Ctrl-a to select all (the whole canvas). Then hold Ctrl and type c. Release both keys. This copies the selection from that image into your clipboard.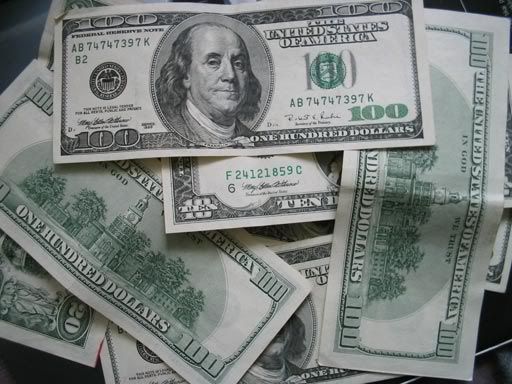
Now we are going to paste this image into our Airplane Shape.Step 6:
Go back to your file with your Airplane shape and click on your Shape layer in the layers palette to select it. Ctrl-click on your Shape layer thumbnail to select the Airplane Shape.Step 7:
Edit--->Paste Into, this will put your Image into the Airplane Shape.
Take a look at your layers palette now,you see your image there and a mask has been made that allows only the Airplane Shape part of the image to show. (Isn't Photoshop intelligent;)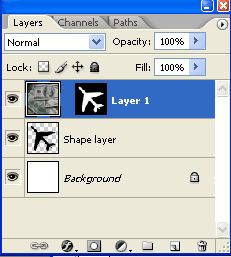
Step 8:
Now, we can edit or resize the image by selecting Ctrl-t or Edit-->Tranform, just be sure to be on the image layer, as you can see above & click on the image thumbnail i.e. layer 1 as above(not layer mask thumbnail) in that layer palette. You can also paste the image twice or thrice & trasform it by following step no.7 & 8.Step 9:
To make the blue background, click on the background and, with blue as your foreground color, alt-backspace to fill. I also applied a Filter-->Render-->Clouds.Step 10:
To complete the look you may apply layer style to your Shape layer as in following pic.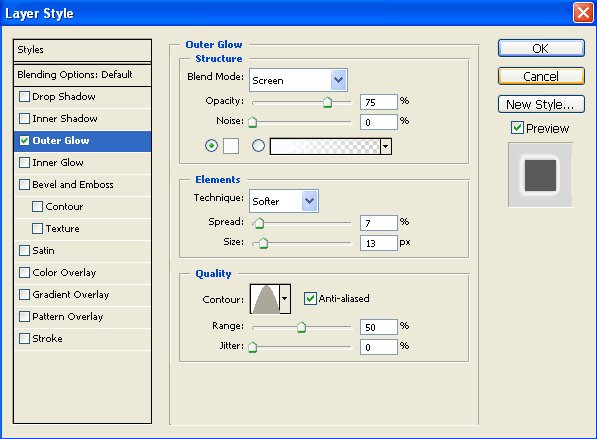
And here is my Final Image!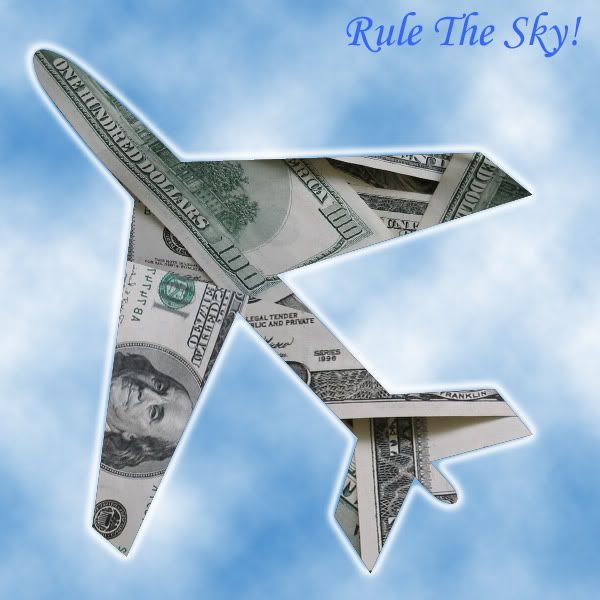
Turn Images Into Shapes
17 December 2006
Subscribe to:
Post Comments (Atom)


2 comments:
I don't have an airplane in my shapes how to I get that shape?
still learning how to's so many ways to do the same things...has impressed me
class teaches only certain things thank you so much
Post a Comment
Hello and welcome to Musings! If you like the article you just read you can subscribe here to get updates via RSS or opt to have them sent directly to your inbox.
I appreciate your feedback so please feel free to comment.